Showing posts with label Home. Show all posts

Monday, November 17, 2014

Week Forty-Four: All the Right Junk in All the Right Places

How do we have so. much. crap. ??

I know I have a weak resolve when it comes to a good deal, and I know we buy more than we should. But, still! Spring cleaning has never really been my thing. I'm more of a spring "Oh my god it's nice out!! Let's go outside!" type versus a spring cleaning type.

Example: I've never once cleaned the outside of the windows in my house, yet the lawn chairs are right inside the garage door for easy access.

No...I'm more of a late fall cleaning type. It is cold outside, which means I'm not missing out on anything by staying inside and sobbing over a pile of baby clothes that are much too small for my baby toddler.

This week's mission was to get some of the junk we have been hoarding in random spots into some logical, permanent homes.

And it was a total and complete epic fail.


  • We put away Halloween decorations: win
  • We shoved them into the closet on top of Christmas decorations that will need to come out soon: fail
  • We dug out hand me downs in the next couple sizes and sorted them into piles in O's room: win
  • We lost ambition and left 6 piles of clothes on the floor in O's room: fail
  • We took all the too small clothes out of O's drawers: win
  • We left those piles on the floor too: fail


So what I'm saying... is that this organizing project requires a tad more ambition than Mike and I seem to have. We'll get there. Eventually. 

I have all kinds of big plans for a toy refresh/switcheroo soon too, so stay tuned to see what my strategy is there. Or to laugh at me when that is a mess too. Either way. ;)


Monday, October 20, 2014

Week Forty: Achievement Unlocked: Throw Together Dinner from Scratch

No food. We have no food in the house. Ever.


I'm not entirely sure how this is possible since one of us is at target or the grocery store at least every other day. And sometimes we get groceries delivered. But still. Nothing to eat.

Cut to the other night when we were hungry for dinner. I decided to throw something together. And I actually succeeded. It was an actual meal. And actually delicious!

I'm not so sure that's ever happened before. Not that I'm bad at cooking, I just don't often throw things together with success.

I got some water boiling, tossed in some whole wheat pasta, and made a garlic cream sauce while the broccoli steamed.

For the sauce {which is obviously the only impressive thing about my meal} I put a little less than half a stick of butter in a pan and got it sizzling. Then I pressed two cloves of garlic in, although I wish I had had more than two cloves on hand. It got all sizzly and smelled amazing. Then I added a little too much flour, and once that was a paste I whisked in some whole milk. {O drinking whole cow milk with meals has really been nice for cooking.} Salt and pepper and ta-da!

I realize for most people this isn't necessarily an accomplishment. But for me it is! :D

What are your go-to throw together meals?!

Thursday, July 24, 2014

Kitchen Helper DIY

.
As promised here, here is our DIY kitchen helper aka "the tower". Mike was very excited to take on this project- partially because he was excited for O to have a tower and partially because he was excited to use his saw.

First we purchased and built our base, which was a step stool from Ikea. Then, Mike ran to Home Depot for some 2x2s. He came home with dowels and hand railing. Definitely a step up in the aesthetics department, and much less work because hand railing and dowels are already nice and smooth. No sanding required. :)

Just testing it out.
Helping Daddy.
Mike cut the hand rail to be the 4 main posts as well as the 3 sided top railing. The dowels served as rails between the posts so O couldn't escape through the sides of the tower. He cut the 3 sided top railing at an angle so it fit together easily. 

Handsome dude excited to use his saw. 
Angled like a boss. 
Just taking some final measurements.

After setting everything up to make sure it looked good we realized that the 4th top railing that would enclose it completely had to be ditched. Thus the 3 sided top railing. The 4th rail would have kept him from falling backwards, but it also made for a very tight fit when he was standing inside it. So away it went. We are still debating adding some sort of rope or dowel or something removable to keep him from falling, but honestly after using the tower for 2 minutes he had it mastered and I really don't think he will fall.

{Ok, except for that one time he fell. But that was my fault. I was pulling something out of his hand and he flew backwards when he let go. Mom fail.}

"Helping" daddy.

Had to get those screws in. Over and over and over again.
Once all the rails were cut and ready to go, Mike drilled little holes in everything and fitted them with little pegs. He stuck them together with the pegs and wood glue, then let it dry with some patio bricks on top since we don't have clamps. {Handy, eh?} The next day he screwed the four main posts to the base and the top 3 rails together as well. Between the pegs and the wood glue and the screws I'd say we have a sturdy tower!

All told this project took like 5 hours or more. But that was including the time spent running back and forth to the Home Depot after we realized plan A {having 4 top rails} was a no-go and needing additional supplies {since we now needed hand rail cut straight rather than angled on two ends}. And it also includes all of O's "help" which could easily account for like an hour. 

In action: he can climb up and down like a pro! It is easily his favorite place to eat snacks. 
In action: helping make banana "cookies". {Recipe here- just scroll down a bit}

I realize that I didn't take as many step by step pictures as I had intended on taking, but hopefully you get the idea. I'm super happy we went with hand rails over 2x2s because the finished product looks so much more.... finished.

I'm pleased to report that the tower has eased 99% of our kitchen troubles {especially him stepping on my toes} and was well worth the time, effort, and cash we put into it. {The 1% is the dishwasher. Damn dishwasher is still a baby magnet. I swear he can hear it open from across the house.}

-H 

Friday, July 11, 2014

Week Twenty-Seven: Kitchen Helper

Do you have a kitchen helper? And by that, I mean a tiny human who won't let you do ANYTHING in the kitchen without them "helping."

O has always been a kitchen helper. Even when he was just Quasimodo crawling around the house, he had to be in the kitchen if we were and he *had* to be under someone's foot. Or in the dishwasher.

And he has not changed. Not even a little bit. Now he can start the dishwasher {which Mike and I realized recently when it was already on the drying cycle and neither of us had started it}, climb the stove and reach the knobs, and open the trash can. He has been such a beast lately that we have tried baby-gating him out of the kitchen entirely, but I've decided the whines and cries and screams and throwing things isn't worth it. So I let him in the kitchen and he stands on my feet while I do whatever I'm doing. That shit hurts. His clammy little feet pull at the skin on top of my feet in the worst way. It puts me over the edge so freaking fast. And that just can't be our new normal. It can't be.

This morning as he whined and stomped on my feet sending me into a stressed out rage I realized what needed to happen. He needs to see what I'm doing. You're probably out there in internet land reading this going- duh- of course that's what he needs! How did you not think of that!?

Well, I figured it out eventually, and that's what counts.

I put O up on our step stool. It didn't let him reach the counter all that well and I had to have one hand on him the whole time so he didn't fall. It was kind of a headache. I decided in a quick hurry that the step stool wasn't an option. Instead we need one of those "learning tower"/ "kitchen helper" things. So I whipped out my phone and started browsing Amazon. Holy. Shit. The cheapest ones were well over $100! Are you kidding me?? I swear, anything wedding or kid/baby related is just a racket. All of it. They overcharge for everything because they know that we, the idiot consumers, will pay for it. Because we need it. I digress.

Buying one of these things is definitely not in the budget, so I bounced from Amazon over to Craigslist. Where I could buy one for..... $95. Wow. What a deal? Apparently these puppies hold their value.

Plan C is officially in the works for this weekend. A quick DIY version built on top of an ikea step stool. Hopefully it is exactly what we need to calm our kitchen helper down and give us some sanity back. I'll for sure post a step by step when we get it done! :)

For now, here are some pictures of our pancake making adventures with the step stool.

.

.

.

-H


Tuesday, June 17, 2014

Week Twenty-Four: Stay at Home Mom for the Summer

I've always had anxiety. But after having O I feel like it has become more of a presence in my life. It's not super overwhelming, it doesn't usually get in the way of living life, it's just...there.

When I started thinking about staying home full time this summer break my anxiety shifted into overdrive. I've been so nervous about it. Nervous about spending all day every day with my kid. Then upset for being a bad mom because I shouldn't be nervous about that. Then getting sad that I can't stay home full time year round with him. Then getting upset that I'm so nervous for a few weeks, I'd never be able to handle staying at home full time even if it were an option! 

Do you see this spiral of crazy that happens in a matter of moments? That's what my anxiety feels like. Thinking about nonsense, but on crack. 

Anyhow, summer was coming, ready or not, and I needed some sort of plan to help curb my crazy brain. 

I decided a schedule would be the best way to help give O and I some structure this summer. As I started pondering what it should look like I turned to my BFF Pinterest. Did you know people have already come up with colorful little posters with a clever little summer schedule for families?!  I'm ever so happy for the inspiration. 

There were a couple schedules that looked fun, and I already had a couple ideas, so here is the mashed together version of a summer schedule that we are going to try to stick to this summer! 

*Disclaimer: I've already given myself permission to skip it some days or to switch up days to fit the weather or plans with friends. I'm not crazy enough to think I will stick to this 100%*


Make it Monday 
-crafting 
-cooking
-art projects
-sand castles
-memories {nice and vague}

Trooper Tuesday
-running errands
-grocery shopping
-cleaning the house
-marching around the neighborhood {playgrounds and just going on walks}

Waterworks Wednesday
-water table
-water park
-beach
-making Popsicles 
-water area at the children's museum

Thinking thespian Thursday
-dress up
-play kitchen
-play tool bench
-library trips

Fresh and Friendly Friday
-play dates 
-fresh ideas to try/see/make/experience 
-farmers market 

BOOM. 

In all honesty, I've already skipped Monday this week because I sent Owen to daycare so I could get some cleaning done at work and at home. And Tuesday-- since I didn't finish cleaning on Monday. {We were already contracted to pay for Monday and Tuesday at daycare, so why not send him so he can play while I'm productive, right?}


Wish us luck!
-H

Thursday, June 12, 2014

Week Twenty-Three: Gardening

Well, I had all these big plans for my garden this year. I started pinning garden ideas and tips and tricks before the snow melted.

I was *ready* to have an even bigger, better garden than last year.

But then life happened. And I got busy. And it is June 11th and I still don't have my plants in the ground.

I have a hard time cutting myself slack. I have a hard time not being able to do everything I want to do. I so wanted this garden to be a success, like it was last year! But instead I was buying bottom of the barrel plants at 8:00 on a Wednesday night, hoping that they will grow enough to produce some veggies before the ground freezes again.

As I drove home from the garden center I was asking myself how on earth I was so on top of things last year. My new favorite app {TimeHop} showed me that one year ago this week I had plants coming up in the garden. How was I *so* far behind last year me?

Then it hit me. DUH. I was on maternity leave last year. With a little baby that didn't try to run into the neighbor's yard when we are outside. AND I had my mother in law's help! I tried to remember what she taught me about gardening. Nothing. I can't remember a single thing. I remember her telling me where to put a stepping stone so I would be able to pick tomatoes without stepping in the dirt. The end. That's it!

So as I set out to plant my plants this year {with a freshly tilled garden all ready for me, thanks to my mother in law} I don't really know where to start. What part of my garden gets shade again? How far apart should I put the green bean seeds?

I fully expect this year to be a disaster, but at least I'm trying. Better late than never, right?

Maybe everything will turn out perfectly. I *do* have a pretty great helper this year ;)


Saturday, March 8, 2014

Week Nine: Freezer Upgrade

For Christmas, we asked for money to put towards a freezer. Mike and I have wanted to get a freezer to put in the furnace room since we moved into this house, but it always seems to fall to the bottom of the to-buy list. For Christmas, we got the money!

So we bought......nothing. We ended up putting the cash into our savings account because we just couldn't pull the trigger on a freezer. We started to wonder if we would get enough use out of it now that my massive breast milk stockpile in our regular freezer is dwindling.

Then, in a serendipitous turn of events, my great great uncle Richard sold his cabin. When my grandparents were there helping him clear it out, they happened upon an old freezer that still works! Since I'm obviously their favorite grandchild {or at least their favorite grandchild that is in the market for a freezer} they grabbed it for me AND delivered it to my house!

So now I have a freezer sitting in the middle of my basement, waiting to be fit into the overcrowded furnace room {didn't really think that part through}. The past few nights I've been really admiring how ugly it is. And it doesn't have to be pretty, I mean, it's an appliance we're going to keep in the furnace room with the spiders and the kitty litter. But my crafty brain switched on and I had an idea.

In a perfect world, I would have an upright freezer. But here in reality, where I have a free chest freezer, that just isn't the case. I wanted to avoid the chest style freezer because I didn't want to lose things buried under other stuff and forget what we even have in there.

So, that's where my crafty brain took over. I decided that I simply don't have enough chalk board in my life. {I've told you guys before that I love a good bandwagon, right?} I was recently reminded of this when my friend Dawn posted on her blog about an awesome kitchen island makeover. Hint: it involved chalk board.

So I decided it would be awesome to paint the entire lid of the chest freezer with chalkboard paint! Not only will I get my chalk board fix and have some fun, but I'll also be able to keep track of what's in the freezer.

We are still deciding if we will have some sort of grid with check marks to indicate how much of each item we have, a simple list, or even a list/diagram combo just for fun.

In any event, it was an easy DIY and I think it will be wonderfully useful as well!

Here's how it went:

Luckily I didn't need to prime it. I did two coats and then after it dried over night I rubbed chalk on and erased it. Martha Stewart told me to. 

Finished Product! 


Pretty fun, right? I think it will be super useful, too! Getting out the chalkboard paint has also inspired another project that I might have to complete in the next couple weeks, so stay tuned for that. :)

-H

Monday, January 27, 2014

Week Three: Baby Games

This week was a tough one.

I was busy with a million different things all week and finding time to do something special for week three of *finding*fifty*two* was rough. {Also evident by the fact that I'm posting a couples days late}

In the middle of a flurry of craziness all week, O and I were able to take some time together to try out some of the infinite ideas that Pinterest {and the internets in general} have for baby play time. 

Here is a round-up of our favorite things this week:


1. Homemade bubbles


While there aren't the fancy "bouncing" bubbles I've seen recipes for before {those contain glycerin which I didn't have on hand}, they were a big hit at our house. I made a few different bubble wands from twisty ties and just mixed the Dawn and water until it seemed like the consistency of bubble solution. I just kept testing it and once I was getting bubbles I stopped messing with the ratios. I pictured the two wands that actually produced bubbles-- the others that I tried just didn't work. O was cautiously fascinated with them. He followed them with his eyes and pointed to them for quite a while before he tried to grab and pop them {Ignore the lid to his bottle that has randomly become one of his favorite toys...}


2. Toys in Ice


O lives for the tub. He loves tubby time so much, I absolutely had to try this idea that I found on my Knoala app. We froze some of O's toys in little bowls so they were covered in ice, and plopped one in the tub with him! He was quite entertained making it bob around, trying to eat it, and watching the toy break free from the ice. {For the record, we keep his bath water on the warm side, and his temperature turtle was floating around to make sure we didn't bathe him in ice water}


3. Laundry fun

This isn't so much an idea I tried as it was something that just happened, but it was definitely a highlight of the week. Often times I try to distract O or wait until he is asleep to do laundry so I can get it done in peace. This week that wasn't an option {hello, mountain containing all of our clothes on the floor} and O was my little helper. I'm not sure which one of us was more entertained. He pulled things out of the dryer one by one and threw them behind him. He picked things up and threw them in the dryer. He screeched and screamed into an echoey, empty dryer. He was so excited about the dryer he was on his tippy toes trying to climb in! We had a blast talking about in and out and clean and dirty together! 


Alrighty- as simple and easy as these little projects were, they were the biggest hits of the week. Hope you enjoyed them!

What do you do to keep your little or littles entertained and engaged when life is hectic? 

Friday, January 17, 2014

Week Two: My Stove

So, a couple months ago {on Thanksgiving} I almost burned our house down. Whoops!

I had forgotten to turn off the back burner on the stove after cooking and then just went about my day. I later went to heat some coffee up in the microwave and tossed our plastic Ikea food-splatter-catcher thing on the stove like I always do when it's not needed. 

I pressed start on the microwave and ran downstairs for something. A few minutes later I had forgotten about the coffee in the microwave {apparently a terribly forgetful day for me} but smelled something burning. I ran upstairs to find flames dancing across my stove. Melted plastic everywhere. 

We managed to put out the flames but two of our four burners were covered in melted plastic. We managed to get most of it cleaned up but some just wouldn't budge. 

Fast forward over a month:

We've managed to get by with just the two burners because we were both avoiding the clean up that we knew would suck. Because of that stubborn avoidance we also stopped cleaning the rest of the stove. Why bother cleaning half the stove when the other half is a mess? 
Well, the embarrassment of how the stove looked finally got to me and I decided it was time to be an adult and clean the damn stove. 


I scoured {haha, see what I did there?} Pinterest for a good stove cleaning plan and a few results came up that involved baking soda and peroxide. After a moment of hesitation where I forgot that it was baking soda and vinegar that creates a volcano, I created a paste of the two ingredients and smeared it all over the stove. I let it work its magic for about 2-3 hours. Mostly because I forgot about it. I'm sure an hour would be sufficient.
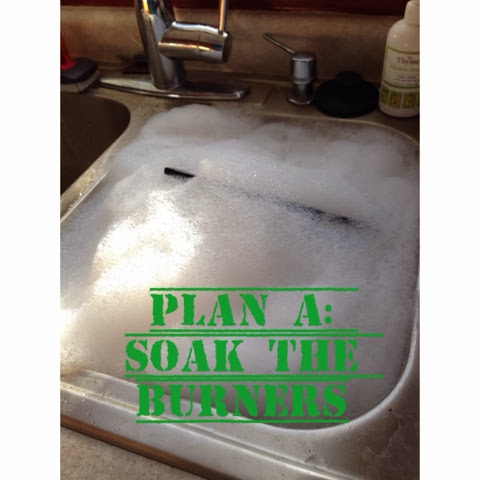
After I got the paste all smeared on, I tossed the burners in a sink full of HOT water and Dawn dish soap. I assumed this would magically melt all the gross off of the burners, and it did not. Even with some scrubbing it just wasn't doing the job. 


With Plan A being a total bust, I grabbed my trusty jug of vinegar to see if that would work any better. Guess what? It did. I filled the sink with more hot water and several hearty splashes of vinegar. After some soaking and some scrubbing with a rag {and a razor blade for the melted plastic} my burners were as clean as they were going to get. Not quite the magic I was hoping for, but they looked a hell of a lot better than when I started and I was able to let them dry while I went about my day. 

Like I said, I totally forgot about the paste on the stove. When I finally got back to it, the paste had hardened and I was able to use a rag and warm water to wipe it off. IT WAS MAGICAL. All the grease and gross wiped right off. A few tough spots required a little more effort to wipe clean, but overall it was a cinch. {I used the razor blade on the melted plastic here, too} 

After all the paste was wiped away I used a little vinegar and water for a streak-free shine. I'd like to think that the stove will never get this gross ever again. But if it does, at least I have a game plan. 

Do you have a cleaning trick you swear by? Let me know!

-H


Friday, January 10, 2014

Week One: Getting My Craft On

Happy New Year!

I really love this time of year. {Aside from the snow and bitter cold} There just seems to be an excitement in the air. Everyone is trying to be a better version of themselves, paying it forward, and starting fresh.

It took way longer than I'd care to admit for me to come up with my first week's topic. I have about 20-30 random ideas I've jotted down so far to use throughout my *finding* fifty* two* project, but for some reason I was stumped at square one. I suppose I've got it in my head that I need to come up with something fantastic for the first week.

Well, here's the problem: I have too many fantastic things to pick from! I am spending time this week planning and prepping for a "Welcome to the World" baby blessing party for my dear friend's new baby girl. However, I'll be blogging about that when it is all said and done and I have gorgeous pictures to share. Since sharing what I'm up to on that project will have to wait a few weeks, I've decided that for week one I'll focus on a DIY project that I've been meaning to do since I was pregnant.

Better late than never, right? {Says the serial procrastinator}

DIY Growth Chart

I really like the look of all those wooden growth charts that can be hung on the wall. You know the ones- they're all over Pinterest- that are painted to look like a ruler.

Well, since I don't have the skills confidence to paint numbers on the wood, I decided to go another direction.


  • 6 foot board {cut to 5.5 feet, because I decided that would fit better in the space I have in mind} The board I bought was about $4 at Home Depot and cut for free!
  • Stain
  • Acrylic Paint
  • Wooden numbers {I found them at Michael's but I'm sure any craft emporium would do}
  • Sauvignon Blanc {optional I suppose, but I don't usually craft without it}

Plan of Attack:

First, I used the back side of the board to test the stain I bought. I went with 'Wedgwood' and tested one coat, 2-3ish coats, and 3-4ish coats. Once it dried I settled on the 3-4 coat look.

Then I played around with paint colors on top of the stain to see which combo I liked the best. I also may or may not have texted everyone I know asking for an opinion which was dumb because after talking to a bunch of people it was essentially a tie anyhow.


Next, it was game time. I had to stain the board in my furnace room because of the aforementioned bitter cold we have been suffering though here in Minnesota. Luckily it didn't smell all that bad and didn't stink up the rest of the house at all. I used a trusty foam brush but I'm sure anything would do the job.
 

I decided to paint the numbers one solid color. That was the Plan B that came about after I spent about an hour on Plan A. I just didn't love the way Plan A worked out. I had envisioned this awesome bronze shadow and a pop of navy blue to match and contrast the blue stain all at once. What I got was an awesome bronze edge and a flat gross looking blue surface. More bronze paint to the rescue!


Then it was time for the finishing touches. My kitty helper, Dewey, made sure to play with the tape measure in such a way that was adorable and annoying all at once. I taped my sewing tape measure to the board because our regular tape measure is in the baby's room and he was asleep. Logical place to keep tools, no?

I made marks with a pencil at every inch mark and went over those lines with navy blue acrylic paint. This is also when I decided that we would hang the chart 9 inches off the floor. That allowed for the best spacing of the numbers on the board. I made the marks longer at each 12 inch interval.

I glued the numbers on just by eyeballing {measuring? straight edge? nahh!} and it was done!


Drumroll please..... Finished product! I still have to get it hanging on the wall. I planned on using the heavy duty Command Velcro type picture hanging strips and Mike seems to think that is a horrible idea. Stay tuned for who wins that battle.

 
I can't wait to get this up on the wall and mark O's first measurement standing all on his own!
 
Do you have a growth chart in your house? How often do you mark on it?
 
-H