Friday, January 31, 2014

Party Pop & Crunch

You probably remember the delicious looking party mix featured at the Baby Blessing Party I threw. Well, here is the recipe! {I adapted it from a recipe on another blog.}

I used the recipe I found to give me a general idea of how much of each thing to add, but ultimately I just eyeballed it. 

What you'll need

*Rice Chex
*Pretzel sticks
*White popcorn {I grabbed a bag of the already popped variety because I'm lazy}
*White melting candies {I used Ghirardelli}
*Sprinkles
*M&Ms


What to do

Mix about 1+ cup each of the Chex, pretzels, and popcorn in a biiiiig bowl. 
Melt the melting candies {next time I am going to try almond bark instead just because we love it so much} and pour them over the mix 
Stir/fluff/fold to coat and then dump it out onto a cookie sheet right away {I lined mine with non-stick tin foil because I hate dishes}
Sprinkle with...well, sprinkles...while everything is still melty but don't stir any more or your sprinkles will disappear
Toss the pan in the fridge until it is set
Add M&Ms to the mix as you bag it up for gifting or serving {waiting until now to add the M&Ms will keep their color nice and vibrant and not coated with the melting candies}

I love this mix because you can really adapt it to your own theme- for this batch I only used purple, pink, and white M&Ms and sprinkles to match so it went with the color scheme of the party. 

You could easily skip the sprinkles or switch them to any color scheme, and same with the M&Ms. 

Try not to shove it in your face by the handful-- I dare you. 

Week Four: Baby Blessing Party

I am so excited to finally share all the fun things I put together for my friend Reilly's sweet little girl's party!
Since this little sweetheart is Reilly's second baby, and she didn't feel like she wanted a baby shower, we decided to come up with a different way to gather all the ladies close to baby Natalia and celebrate her earth-side arrival! 

I jumped at the chance to throw this "Baby Blessing" or "Welcome to the World" party. Not a baptism, not a shower, but just a time for family and friends to come together specifically to shower Natalia with love. 
I created an invite using my favorite picture editing website. {PicMonkey} Instead of using a photo I just chose to work on a "canvas" and added text and graphics. It was pretty easy and I'm so happy with how it turned out! 


I never intended on having a theme beyond a color scheme, but one thing led to another and we had an owl themed party. Lia's nursery has some owl touches as well, so I think it worked out pretty well. 
I bought a paper punch that embosses and punches in one hand-cramping easy motion. I used the little card stock owls it produced throughout the party. They're so darn cute!


Washi tape was on my list of things to include in the party, but I wasn't able to find any that really matched the color scheme the way I wanted. So, I improvised and purchased these two rolls of decorative tape from Target and they worked great! Not as easy to tear as washi tape, but the color was right, so I wasn't complaining. 


I also simply *needed* to include paper straws because the internets told me I had to. Every adorable party on Pinterest has them, and Target is displaying them front and center in their party aisle. Bandwagon? Yup. I love a good bandwagon!


Now, without further ado, I present to you my favorite photos of the party!


Desserts and Drinks

Food ala Pinterest

Sweet peppers are my favorite in a veggie tray!

Party mix in paper "cones"
Recipe Here

Lemon cupcakes {and owls}

In love with my stemless wine glasses!

.

I'm obsessed with the mango lemonade from Trader Joe's- add Sprite and you've got punch!


Paper straws+decorative tape

The decorative tape did not get old// Pens to use for the Baby Wishes book
My wonderfully talented mother in law painted and constructed this book just for little Lia
Everyone at the party wrote a little something to Natalia// I started the book off with my favorite poem 

So, there you have it! My first attempt at a baby party! I think it turned out pretty great and everyone loved showering Natalia with snuggles and writing sweet words in her book.

Monday, January 27, 2014

Week Three: Baby Games

This week was a tough one.

I was busy with a million different things all week and finding time to do something special for week three of *finding*fifty*two* was rough. {Also evident by the fact that I'm posting a couples days late}

In the middle of a flurry of craziness all week, O and I were able to take some time together to try out some of the infinite ideas that Pinterest {and the internets in general} have for baby play time. 

Here is a round-up of our favorite things this week:


1. Homemade bubbles


While there aren't the fancy "bouncing" bubbles I've seen recipes for before {those contain glycerin which I didn't have on hand}, they were a big hit at our house. I made a few different bubble wands from twisty ties and just mixed the Dawn and water until it seemed like the consistency of bubble solution. I just kept testing it and once I was getting bubbles I stopped messing with the ratios. I pictured the two wands that actually produced bubbles-- the others that I tried just didn't work. O was cautiously fascinated with them. He followed them with his eyes and pointed to them for quite a while before he tried to grab and pop them {Ignore the lid to his bottle that has randomly become one of his favorite toys...}


2. Toys in Ice


O lives for the tub. He loves tubby time so much, I absolutely had to try this idea that I found on my Knoala app. We froze some of O's toys in little bowls so they were covered in ice, and plopped one in the tub with him! He was quite entertained making it bob around, trying to eat it, and watching the toy break free from the ice. {For the record, we keep his bath water on the warm side, and his temperature turtle was floating around to make sure we didn't bathe him in ice water}


3. Laundry fun

This isn't so much an idea I tried as it was something that just happened, but it was definitely a highlight of the week. Often times I try to distract O or wait until he is asleep to do laundry so I can get it done in peace. This week that wasn't an option {hello, mountain containing all of our clothes on the floor} and O was my little helper. I'm not sure which one of us was more entertained. He pulled things out of the dryer one by one and threw them behind him. He picked things up and threw them in the dryer. He screeched and screamed into an echoey, empty dryer. He was so excited about the dryer he was on his tippy toes trying to climb in! We had a blast talking about in and out and clean and dirty together! 


Alrighty- as simple and easy as these little projects were, they were the biggest hits of the week. Hope you enjoyed them!

What do you do to keep your little or littles entertained and engaged when life is hectic? 

Thursday, January 23, 2014

Accidentally Crunchy: Introduction

Outside of my *finding*fifty*two* project I'd like to blog about random other things as well. Starting with a little series I'm calling Accidentally Crunchy.

I never set out to be a "crunchy" mom. {I still don't think I am, really} but once you make one decision about your baby/birth/parenting there is absolutely a path that kind of just opens up in front of you. 


When I decided that I wanted to try to have a drug-free birth I started down what has turned out to be a kind of crunchy path. 

The books and blogs and articles I read to prepare me for the birth I wanted alluded to or suggested other topics. One thing led to another and here we are. Accidentally crunchy. 

But my thought is: why can't I have it all?
Why can't I have a natural birth AND feed my kid regular {not organic} food?
Why can't I cloth diaper AND carry a Coach bag? 
Do I really have to go down the rabbit hole of no-poo {google it} and homeopathic everything just because I prefer wearing my baby over using the stroller? 

I give O homeopathic teething tablets. I also give him baby Advil. And baby Tylenol. {Teething is a B} And I'm ok with that! 

I think I've found a pretty good balance, mostly due to the confidence I have in my decisions and the support I have in my hubby. 

My point is, I never set out to parent/live like we do. It just happened.

Hopefully my crunchy ways are entertaining and informative.

*I'd also like to point out that I am not one to turn up my nose at parents who do things differently- parenting is hard enough without some a-hole rolling their eyes at your choices*


Friday, January 17, 2014

Week Two: My Stove

So, a couple months ago {on Thanksgiving} I almost burned our house down. Whoops!

I had forgotten to turn off the back burner on the stove after cooking and then just went about my day. I later went to heat some coffee up in the microwave and tossed our plastic Ikea food-splatter-catcher thing on the stove like I always do when it's not needed. 

I pressed start on the microwave and ran downstairs for something. A few minutes later I had forgotten about the coffee in the microwave {apparently a terribly forgetful day for me} but smelled something burning. I ran upstairs to find flames dancing across my stove. Melted plastic everywhere

We managed to put out the flames but two of our four burners were covered in melted plastic. We managed to get most of it cleaned up but some just wouldn't budge. 

Fast forward over a month:

We've managed to get by with just the two burners because we were both avoiding the clean up that we knew would suck. Because of that stubborn avoidance we also stopped cleaning the rest of the stove. Why bother cleaning half the stove when the other half is a mess? 
Well, the embarrassment of how the stove looked finally got to me and I decided it was time to be an adult and clean the damn stove. 


I scoured {haha, see what I did there?} Pinterest for a good stove cleaning plan and a few results came up that involved baking soda and peroxide. After a moment of hesitation where I forgot that it was baking soda and vinegar that creates a volcano, I created a paste of the two ingredients and smeared it all over the stove. I let it work its magic for about 2-3 hours. Mostly because I forgot about it. I'm sure an hour would be sufficient.
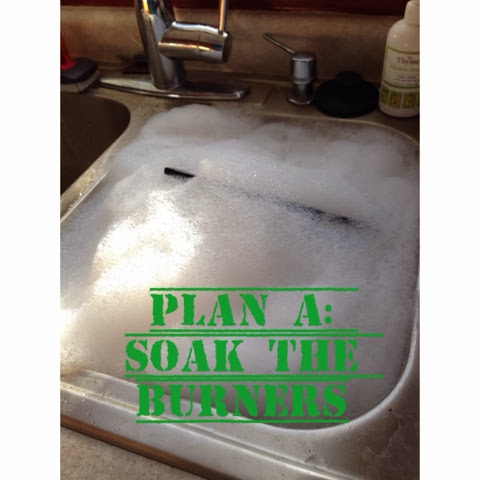
After I got the paste all smeared on, I tossed the burners in a sink full of HOT water and Dawn dish soap. I assumed this would magically melt all the gross off of the burners, and it did not. Even with some scrubbing it just wasn't doing the job. 


With Plan A being a total bust, I grabbed my trusty jug of vinegar to see if that would work any better. Guess what? It did. I filled the sink with more hot water and several hearty splashes of vinegar. After some soaking and some scrubbing with a rag {and a razor blade for the melted plastic} my burners were as clean as they were going to get. Not quite the magic I was hoping for, but they looked a hell of a lot better than when I started and I was able to let them dry while I went about my day. 

Like I said, I totally forgot about the paste on the stove. When I finally got back to it, the paste had hardened and I was able to use a rag and warm water to wipe it off. IT WAS MAGICAL. All the grease and gross wiped right off. A few tough spots required a little more effort to wipe clean, but overall it was a cinch. {I used the razor blade on the melted plastic here, too} 

After all the paste was wiped away I used a little vinegar and water for a streak-free shine. I'd like to think that the stove will never get this gross ever again. But if it does, at least I have a game plan. 

Do you have a cleaning trick you swear by? Let me know!

-H


Friday, January 10, 2014

Week One: Getting My Craft On

Happy New Year!

I really love this time of year. {Aside from the snow and bitter cold} There just seems to be an excitement in the air. Everyone is trying to be a better version of themselves, paying it forward, and starting fresh.

It took way longer than I'd care to admit for me to come up with my first week's topic. I have about 20-30 random ideas I've jotted down so far to use throughout my *finding* fifty* two* project, but for some reason I was stumped at square one. I suppose I've got it in my head that I need to come up with something fantastic for the first week.

Well, here's the problem: I have too many fantastic things to pick from! I am spending time this week planning and prepping for a "Welcome to the World" baby blessing party for my dear friend's new baby girl. However, I'll be blogging about that when it is all said and done and I have gorgeous pictures to share. Since sharing what I'm up to on that project will have to wait a few weeks, I've decided that for week one I'll focus on a DIY project that I've been meaning to do since I was pregnant.

Better late than never, right? {Says the serial procrastinator}

DIY Growth Chart

I really like the look of all those wooden growth charts that can be hung on the wall. You know the ones- they're all over Pinterest- that are painted to look like a ruler.

Well, since I don't have the skills confidence to paint numbers on the wood, I decided to go another direction.


  • 6 foot board {cut to 5.5 feet, because I decided that would fit better in the space I have in mind} The board I bought was about $4 at Home Depot and cut for free!
  • Stain
  • Acrylic Paint
  • Wooden numbers {I found them at Michael's but I'm sure any craft emporium would do}
  • Sauvignon Blanc {optional I suppose, but I don't usually craft without it}

Plan of Attack:

First, I used the back side of the board to test the stain I bought. I went with 'Wedgwood' and tested one coat, 2-3ish coats, and 3-4ish coats. Once it dried I settled on the 3-4 coat look.

Then I played around with paint colors on top of the stain to see which combo I liked the best. I also may or may not have texted everyone I know asking for an opinion which was dumb because after talking to a bunch of people it was essentially a tie anyhow.


Next, it was game time. I had to stain the board in my furnace room because of the aforementioned bitter cold we have been suffering though here in Minnesota. Luckily it didn't smell all that bad and didn't stink up the rest of the house at all. I used a trusty foam brush but I'm sure anything would do the job.
 

I decided to paint the numbers one solid color. That was the Plan B that came about after I spent about an hour on Plan A. I just didn't love the way Plan A worked out. I had envisioned this awesome bronze shadow and a pop of navy blue to match and contrast the blue stain all at once. What I got was an awesome bronze edge and a flat gross looking blue surface. More bronze paint to the rescue!


Then it was time for the finishing touches. My kitty helper, Dewey, made sure to play with the tape measure in such a way that was adorable and annoying all at once. I taped my sewing tape measure to the board because our regular tape measure is in the baby's room and he was asleep. Logical place to keep tools, no?

I made marks with a pencil at every inch mark and went over those lines with navy blue acrylic paint. This is also when I decided that we would hang the chart 9 inches off the floor. That allowed for the best spacing of the numbers on the board. I made the marks longer at each 12 inch interval.

I glued the numbers on just by eyeballing {measuring? straight edge? nahh!} and it was done!


Drumroll please..... Finished product! I still have to get it hanging on the wall. I planned on using the heavy duty Command Velcro type picture hanging strips and Mike seems to think that is a horrible idea. Stay tuned for who wins that battle.

 
I can't wait to get this up on the wall and mark O's first measurement standing all on his own!
 
Do you have a growth chart in your house? How often do you mark on it?
 
-H